 Attack on Titan 3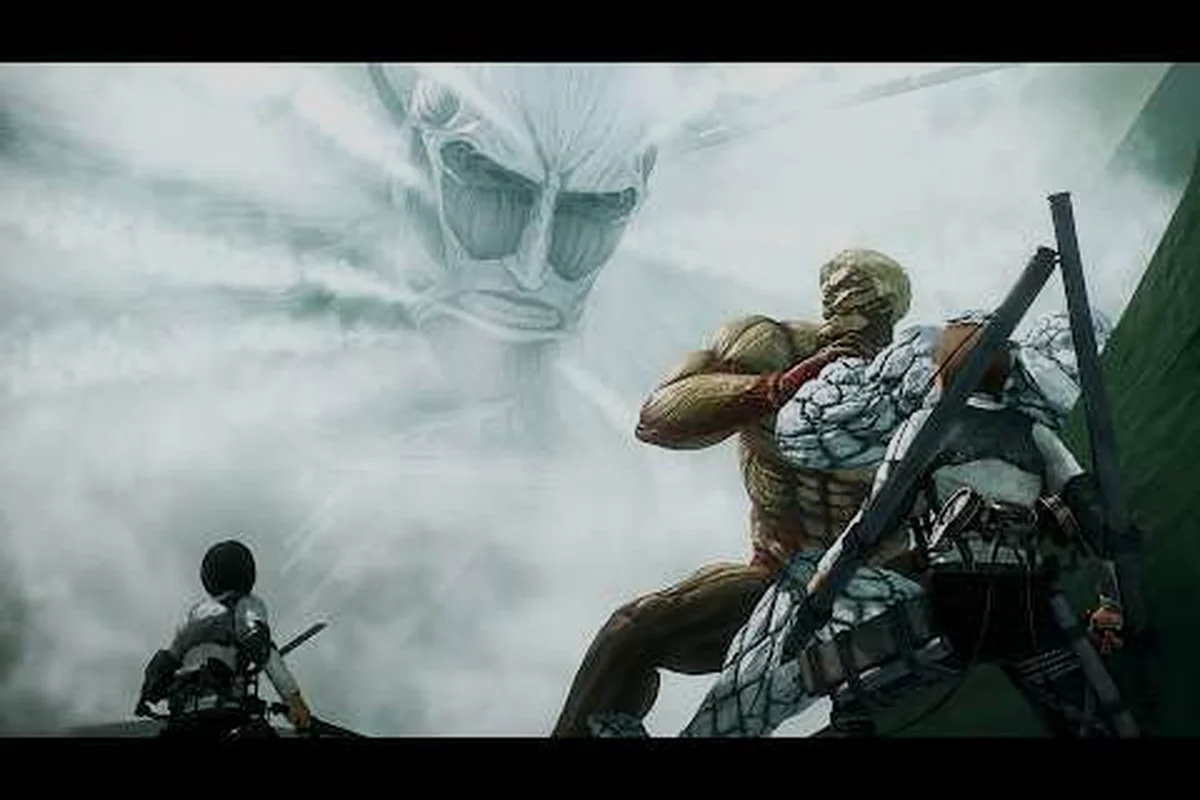
The Armored Titan boss in Attack on Titan 3 stands as one of the toughest wall-cracking encounters you will face during the saga's mid-game chapters. Its plated skin shrugs off standard blade strikes, and Reiner's hardened shell forces scouts to rethink their entire approach to ODM combat. Players who walk into this fight unprepared often burn through their gas and blade supply before exposing a single weak point.
Understanding the Armored Titan boss means studying the Titan hardening mechanic, learning how other Shifters like the Beast Titan or War Hammer behave on the field, and knowing when to call in Buddy Arts for breaking defense. This guide breaks down everything you need to survive the encounter, from pre-fight loadouts to the final Coordinate-triggered finisher, and connects the dots to the broader Nine Titan roster covered across our complete Nine Titan roster breakdown.
Armored Titan Boss Overview and Core Attributes
The Armored Titan boss is a heavy-class Shifter encounter built around endurance and armor stripping. Unlike the Colossal or Attack Titan, this boss does not rely on burst damage or area denial. Instead, it walks forward, swings, and waits for scouts to commit before countering with a grabbing slam. According to community testing on the most recent patch, the Armored Titan HP pool sits roughly between the Beast Titan and the War Hammer Titan, making it a marathon rather than a sprint.
| Attribute | Armored Titan Value | Compared to Beast Titan | Compared to War Hammer Titan |
|---|---|---|---|
| HP Pool | High (tier 3) | Slightly lower | Noticeably higher |
| Armor Plates | Full body coverage | N/A (beast form) | Partial gauntlets/weapon |
| Weak Point | Nape (after armor break) | Nape (always) | Crystal shell (regenerates) |
| Primary Attack | Grabbing slam | Long-range throw | Hammer swing / spikes |
| Recommended Squad Size | 2-4 scouts | 3-4 scouts | 2-3 scouts |
| Gas Drain Per Attempt | Very high | Medium | High |
Reiner's combat AI in Attack on Titan 3 prioritizes closing distance and punishing aerial strafing. When you boost toward the nape for a blade strike, the Armored Titan will often feint a low swing and switch to an overhead grab. Players report that the feint window is roughly 0.4 seconds long, which is faster than most casual mode players can react to. The game registers the grab as a one-hit kill on default difficulty, so dodging with Boost Move is mandatory.
Two key mechanics define this fight:
-
Plated Defense Stance: The Armored Titan enters a defensive crouch after taking 15% of its max HP, generating temporary armor that absorbs two full blade combos. Use Buddy Arts to stagger it out of the stance.
-
Shifter Recovery: When staggered at low HP, the boss regenerates its outer armor plates over 6 seconds. Deal damage during this window to interrupt the recovery and lock it into a vulnerable state.
If you are coming from the Colossal Titan boss fight, you will notice the pacing is much slower. The Colossal is about dodging explosions, while the Armored is about stripping armor layer by layer.
Armored Titan Hardening Mechanic and How Armor Layers Work
The Titan hardening mechanic in Attack on Titan 3 is the single biggest barrier between you and a clean kill. Every Armored Titan plate absorbs a fixed percentage of incoming blade damage, stacking multiplicatively as more plates remain. Community data from multiple playtest sessions suggests that the first plate reduces damage by 60%, the second by 40%, and unarmored strikes deal 100% baseline.
How Plated Damage Reduction Stacks
| Plates Remaining | Damage Reduction | Effective Damage on 1,000 Base Hit | Time to Strip (Per Scout) |
|---|---|---|---|
| 5 (Full Set) | ~90% total | ~100 damage | 8-10 seconds |
| 4 | ~75% total | ~250 damage | 6-8 seconds |
| 3 | ~55% total | ~450 damage | 5-6 seconds |
| 2 | ~30% total | ~700 damage | 3-4 seconds |
| 1 | ~10% total | ~900 damage | 2 seconds |
| 0 (Nape Exposed) | 0% | 1,000 damage | Immediate combo window |
The trick to breaking the Armored Titan boss efficiently is understanding which attacks crack which plates. Light ODM strikes only scratch the outermost layer, so you need to commit full sword combos to the limbs before the nape becomes viable. Once a limb is fully stripped, the boss will limp and favor that side, which opens up safe flank attacks.
Buddy Arts and Armor Breaking
The Armored Titan boss responds dramatically to squad coordination. Buddy Arts in Attack on Titan 3 trigger when two scouts land a synchronized strike on the same body part. Against this boss, the most efficient Buddy Art chain is:
-
Thunder Spear Volley (squad-mate ability): Strips one plate instantly and staggers the boss for 2 seconds.
-
Crossfire Strike (your follow-up): Deals 1,200 damage during the stagger window if the nape is exposed.
-
Boost Move retreat: Re-position to avoid the guaranteed counter-slash that follows every stagger.
According to the GamesPress press release, Buddy Arts have been rebalanced in Attack on Titan 3 to give them a more decisive role in boss fights, and the Armored Titan encounter is where this change matters most.
Related Titan Boss Fights: Beast, War Hammer, and Coordinate Pressure
The Armored Titan boss rarely appears in isolation. Most story missions in Attack on Titan 3 chain it with at least one secondary Shifter encounter, and understanding the supporting roster makes the fight dramatically easier.
Beast Titan Encounter — The Ranged Counterpart
When you face the Beast Titan alongside or after the Armored, the threat profile flips entirely. Zeke's form sits at range and lobs debris, which means your ODM approach angles get punished if you fly in a straight line. Knowing how to beat Beast Titan encounters is mostly about timing your boost dashes between throws and using the Armored Titan's armored body as cover. Community data suggests that pairing a tanky scout loadout for Armored with a long-range Thunder Spear kit for Beast is the most reliable duo build.
The Beast Titan also uses hardening on its throwing arm in late phases. A successful Thunder Spear hit to the throwing arm temporarily disables ranged attacks for 12 seconds, which is your window to rush the nape on the Armored.
War Hammer Titan Abilities and What to Steal
The War Hammer Titan abilities make it the most technical Shifter encounter in the game. Lara's combat kit revolves around generating crystal weapons on demand, which can include hammers, spikes, and even wire traps. Unlike the Armored's passive armor, War Hammer armor is generated actively, meaning coordinated pressure can deny the boss the time to build a weapon. For Armored Titan boss runs, this matters because you can sometimes lure a War Hammer into breaking Armored plates with its hammer swings, exposing the nape for free.
For a deep dive into the War Hammer kit, our Founding Titan boss guide covers related Shifter combat patterns, including how Coordinate powers interact with these encounters.
Founding Titan Coordinate Power and Armored Finishing
The Founding Titan Coordinate power in Attack on Titan 3 unlocks during the final act and lets you trigger a 15-second control window over nearby Pure Titans. The Armored Titan boss, being a Shifter, is normally immune to Coordinate, but the armor-breaking system creates an exploit: when the Armored Titan is in the Shifter Recovery phase with no plates remaining, a Coordinate pulse interrupts the recovery and stuns the boss for 4 extra seconds. Skilled players use this window to land the final nape combo.
| Titan Boss | Coordinate Vulnerable? | Best Counter From Armored Kit | Recommended Order |
|---|---|---|---|
| Armored Titan | No (except recovery window) | Thunder Spear plates strip | 1st or 2nd |
| Beast Titan | No | Use Armored body as shield | 2nd or 3rd |
| War Hammer Titan | Partial (during crystal regen) | Bait hammer into Armored plates | 3rd |
| Founding Titan | Yes (full Coordinate window) | Avoid — save for final phase | Last |
Armored Titan Boss Strategy: Step-by-Step Loadout and Execution
Winning the Armored Titan boss fight in Attack on Titan 3 requires a specific loadout, a clear phase plan, and the discipline to retreat when a combo is unsafe. Below is the squad build and rotation that community playtesters report as the most consistent clear method.
Recommended Pre-Fight Loadout
| Slot | Gear Recommendation | Why It Works |
|---|---|---|
| ODM Gear | Reinforced Cables (max upgrade) | Higher weight limit for Thunder Spears |
| Primary Blade | Hardened Alloy Blade | Deals bonus damage to armored plates |
| Secondary Blade | Standard Steel Blade | Faster swing speed for combo chains |
| Ranged | 4x Thunder Spears | Strips plates in one hit each |
| Gas Cylinders | 3x Large Capacity | Extends sustained flight time |
| Buddy Art Synergy | Thunder Spear Volley + Crossfire | Best armor-breaking chain |
Phase-by-Phase Execution
Phase 1 (100% to 70% HP) — Open With Thunder Spears
Start the fight by boosting upward to gain altitude, then dive in a diagonal line toward the boss's right shoulder. Throw one Thunder Spear at the shoulder, one at the left knee, and one at the back. Each direct hit strips one plate. After three Spears, the boss will be locked in a 3-second stagger. Land two full blade combos to the shoulder and retreat using Boost Move.
Phase 2 (70% to 40% HP) — Trigger Buddy Arts
At this point, the Armored Titan boss will enter Plated Defense Stance after taking 15% of its remaining HP. Call in your squad-mate for the Thunder Spear Volley Buddy Art, which strips the freshly regenerated plate and staggers for 2 seconds. Switch to your Hardened Alloy Blade and focus fire on the nape while the stagger holds. The boss will counter with a grabbing slam roughly 2 seconds after the stagger ends, so set a Boost Move shortcut and trigger it on reaction.
Phase 3 (40% to 0% HP) — Coordinate and Cleanup
Once the boss drops below 40% HP, the Shifter Recovery mechanic activates every 20 seconds. Time your Coordinate power for the recovery window if you have it unlocked; otherwise, focus on consistent blade combos. At 10% HP, the Armored Titan will go into a desperation flail mode where it swings in 360-degree arcs. Stay above the boss and only dive when the arms are extended outward.
According to DLCompare's gameplay breakdown, the Boost Move mechanic in Attack on Titan 3 was designed exactly for these emergency evasion windows, and mastering it is the difference between a one-cycle kill and a full inventory reset.
Common Mistakes to Avoid
-
Do not over-commit to aerial combos. The Armored Titan boss punishes extended airtime with a guaranteed grab.
-
Do not use standard blades on full-armor sections. You will burn durability for minimal damage.
-
Do not ignore Buddy Art callouts. The squad's Thunder Spear Volley is the single most efficient armor strip in the game.
-
Do not trigger Coordinate too early. Save it for the Shifter Recovery phase at low HP.
For more equipment recommendations and ranked loadouts, the best equipment ranked tier list covers which blades, cables, and gas cylinders scale best into the late-game Titan fights.
Frequently Asked Questions
What is the fastest way to break Armored Titan plates?
The fastest plate-breaking method in Attack on Titan 3 is the Thunder Spear Volley Buddy Art combined with a full sword combo to the nape during the stagger window. A coordinated squad can strip all five plates in under 30 seconds, which is roughly half the time of solo play.
Can the Armored Titan boss use Coordinate powers?
No, the Armored Titan is a Shifter and is fully immune to the Founding Titan Coordinate power under normal conditions. The only exception is during the Shifter Recovery phase at low HP, where a Coordinate pulse will interrupt the armor regen and stun the boss for 4 seconds.
How does Titan hardening differ from War Hammer crystal armor?
The Titan hardening mechanic used by the Armored Titan is a passive, always-on armor layer that absorbs damage multiplicatively. The War Hammer Titan abilities generate active crystal weapons and shields on demand, which can be broken faster but regenerate as long as the user has focus. Hardening is bulkier; War Hammer crystal is more technical.
Should I fight the Beast Titan or Armored Titan first?
Community playtesters report that taking the Armored Titan first is safer because the Beast Titan's ranged throws can knock you out of the air during an Armored combo. Clearing the Armored removes one threat from your peripheral vision and lets you focus dodges on the Beast's debris arcs. For a full strategy on the Beast, check the Beast Titan boss guide.
What difficulty is recommended for first-time Armored Titan boss players?
Intermediate or Story Mode is recommended for first attempts because Casual mode removes the grab-one-hit-kill mechanic entirely, which can mask the timing windows you need to learn. Once you can clear the boss on Intermediate without losing a squad-mate, the transition to Advanced is much smoother.
Got a different loadout that crushes the Armored Titan boss faster? Drop your build in the comments, and we will test it against the next patch. If this guide helped you survive the encounter, share it with your scouting regiment so they stop wasting gas on full-armor combos.